|
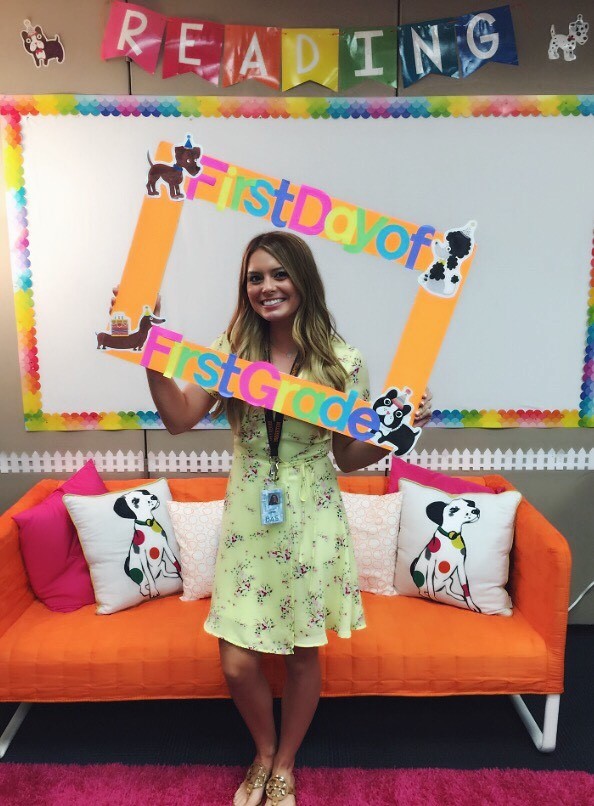
When I thought about setting up my classroom as a first year teacher, I was like a kid in a candy store. Over the years I had been in so many different classrooms, followed countless teacher accounts on Instagram and pinned a million ideas on Pinterest. I COULDN’T WAIT to make all the decisions myself for OUR classroom (mine & my students.) My biggest goal was for my students to feel welcome. I wanted my students to walk into OUR classroom and never want to leave. This was our home after all! After researching ideas all summer (and following so many teacher accounts on Instagram I hardly saw any of my personal friends’ posts anymore) I had a vision. I didn’t know exactly what furniture I would have to work with, but having worked at the same school during my student teaching, I knew the rooms pretty well and what I would have space for. So, as you probably guessed, I was that teacher decorating her classroom after PD until late at night, coming in on the weekends and dragging my parents with me for help to make my vision come to life. My vision was this: rainbow colors with cute puppies, a reading nook, a math corner, a word wall, and a brightest work wall. What do you think? Photos by: Hayley Justin After setting up my dream classroom, I found myself incredibly overwhelmed thinking about what I was actually going to do with my students on the very first day of school. Luckily, my teaching partner happened to be my mentor teacher for student teaching, and we work fabulously together, so it all worked out. However, looking back, I realize that I was doing the opposite of what I feel like most first year teachers do. I was so focused on the environment that I didn’t have a plan for even the first day of school. Although a lot of research is pushing teachers to think more about their classroom environment than most do, I feel like I needed to find the happy medium.  Photo from: The Third Teacher Going into my third year of teaching, it’s about time I reevaluate my classroom setup. Although this is difficult for me to do, I will admit that I think my future students will benefit from a #re-design. This week, I took some time to explore a few different digital design tools to help me with my #re-design. At first, I was totally frustrated. Some of the websites I tried were way too advanced for me and most were geared toward designing homes, which made it hard to find what I needed for a classroom. However, I did my best to emulate what my classroom currently looks like, so I could go from there with my #re-design. Keep in mind the websites only have certain pieces of furniture in certain colors and whatnot. See my current classroom setup below! 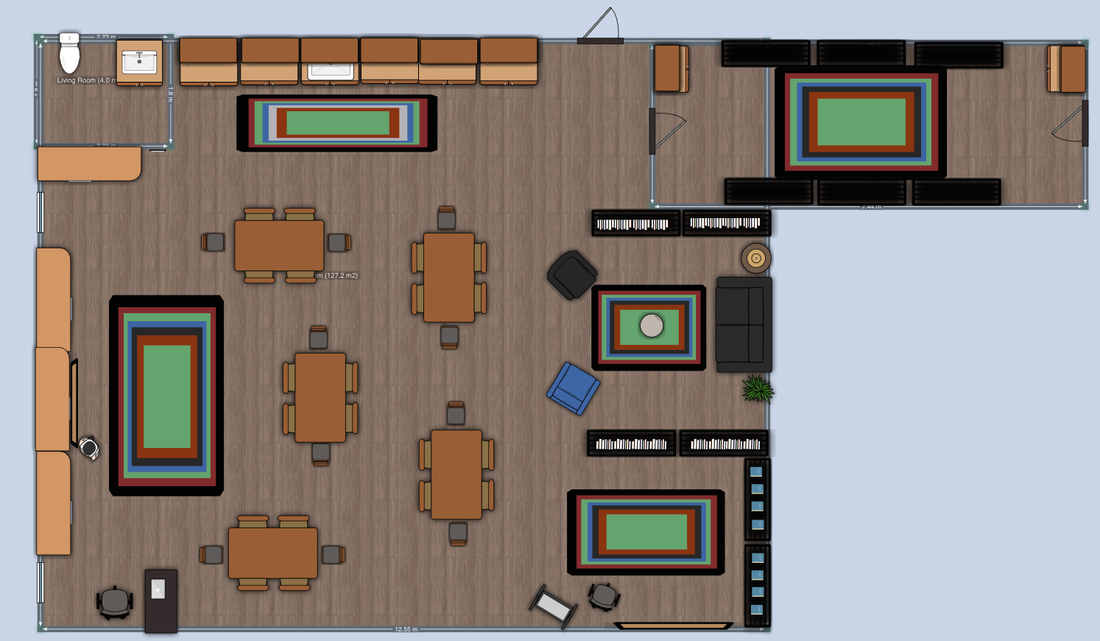 Photo by: Hayley Justin After looking at the design of my physical space, I’m realizing the majority of my space in my room is taken up by my students’ tables. I teach first grade to 6 and 7 year olds – little people! They do not need this much space! Also, I have always desired to have round tables in my classroom to foster better collaboration, but they are a hot commodity at my school and aren’t always available. If I had the ability, this would probably be the first change I would make to my classroom. After changing to round tables, hopefully this would free up some extra space in my classroom I actually had in my original vision before I started my first year. See my #re-design below! 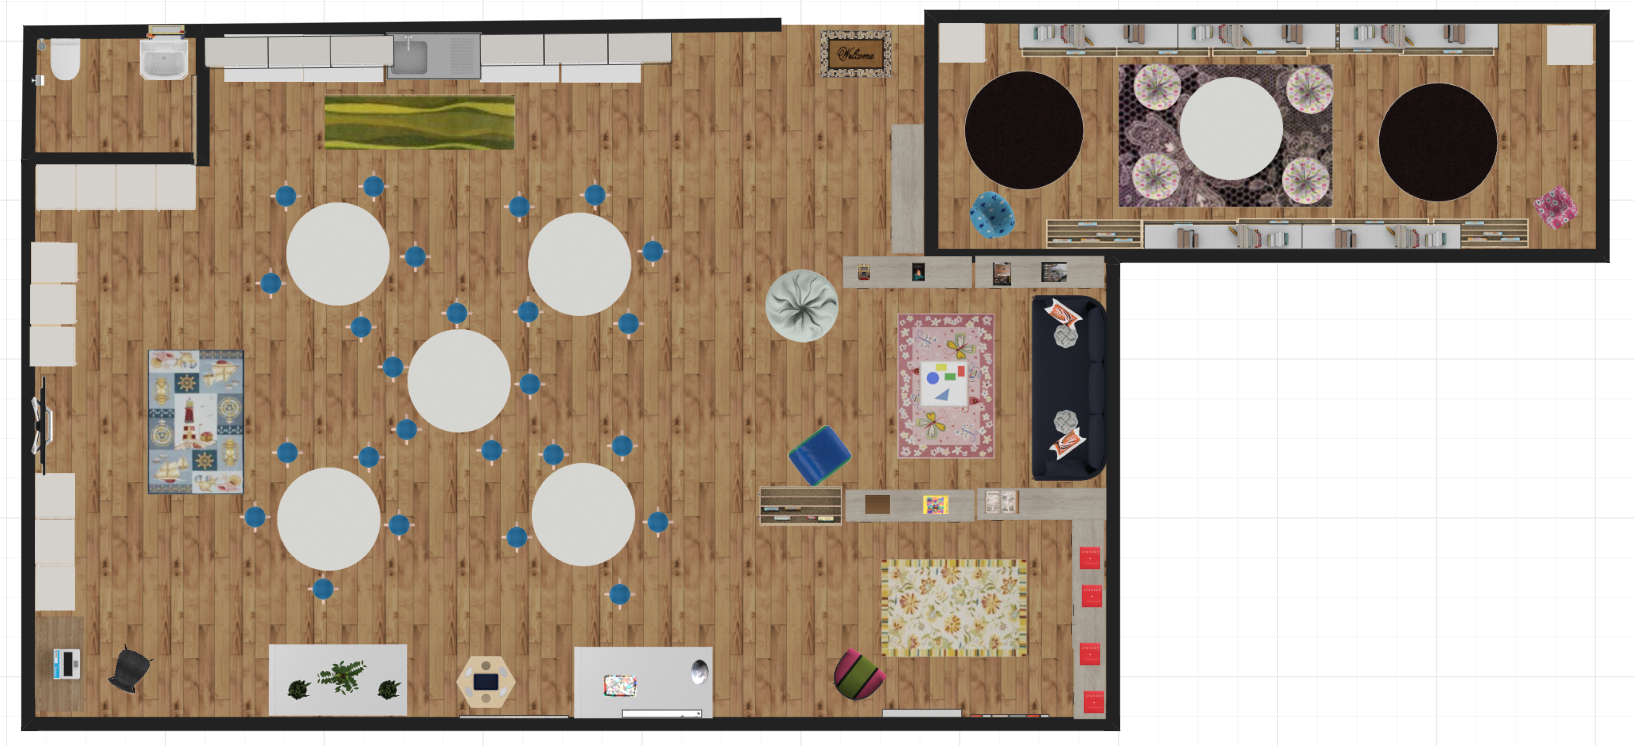 Photo by: Hayley Justin In the back of the classroom (the far right) in both designs, I have our reading nook and our math corner. I absolutely love this part of our classroom, so do my students. They love to cozy up with a book in the nook or play a game in the math corner. I feel as though the placement of my bookshelves maximizes the space while also separating the room into sections that make it feel more homey. These separated spaces also come in handy during group work or stations.
With that extra space freed up from the round tables I mentioned above, I would love to create areas for more collaboration in other “subjects.” Although we use the reading nook and math corner for all subjects all day, I like the idea of having a space for their thoughts and ideas about what we are currently learning. One of these tables might serve as a space to put objects we are studying in science, conveniently placed below our KLEWS chart we use throughout our science units. I would also like to have a better space for my students to access tools during writer’s workshop. Often times, I set new papers they might need on our blue rug or we have extra paper by the sink. These don’t seem to be the best spaces as they could get stepped on on the rug and wet by the sink. With that said, I’d like to create a space for writers in this area. I’d also like to have an area where students can access different tools and items they might need to create, similar to a maker space. We have a wonderful maker space in our STEAM center my students are used to. After many readings, especially Lifelong Kindergarten, during my MAET courses along with my experience with Cultures of Thinking, I’ve decided to try a new morning routine this year. I’d like for my students to come in and create something instead of doing morning work. Keeping this in mind, this creating space would be a welcomed addition. The last major change I made in my re-design was in our “Classroom Library.” Every classroom in our school has an “office” that connects two classrooms. Most teachers use this as a place to keep their desk and all of their personal belongings, storage, etc. My teaching partner had the wonderful idea to turn ours into a library and group work area for our students. For the last two years, we’ve done a good job of keeping our books organized, having the kids go “book shopping” in the library, and having some group work in there. However, the space can get crammed and the books can get left out creating a mess that needs to be cleaned up before any groups can go work in there. To fix this problem, I’d like to add some specific seating options that will remind students that this room isn’t just for storing books - especially not leaving them out. Hopefully by adding round rugs for group meetings along with a table and chairs, this space will become more usable. Overall, I am keeping with our classroom “themes.” The students love the rainbow colors (as do I) along with the puppies (as do I). I love the identity we have created together, especially when my former students still consider themselves a puppy. Hopefully when they come back and visit they like the changes I’ve made. Here’s to #re-design! O'Donnell Wicklund Pigozzi and Peterson, Architects Inc., VS Furniture., & Bruce Mau Design. (2010). The third teacher: 79 ways you can use design to transform teaching & learning. New York: Abrams. Resnick, M. (2017). Lifelong Kindergarten: Cultivating creativity through projects, passion, peers, and play. Cambridge, MA: The MIT Press.
0 Comments
A couple of weeks ago, I discovered a new technological tool and wrote a learning experience with my students in mind. You can learn more about that tool, Makey Makey, in my previous post here. I wanted to create an experience that would allow my students to use the tool in a way that made sense for the lesson and the content. I thought hard about this but finally ended up finding my direction when I made a list of conductors and a list of content I teach. Down the list I went until I found the same item on both sides: coins. I would create an innovative learning experience where my students would use Makey Makey to help them practice counting coins to a certain amount. After drafting my lesson plan and sharing it with my peers for some feedback, I began some research. Through Michigan State's library website I found two great dissertations that focus on using technology in classrooms. One article is a case study by Erik Jon Byker of Michigan State on the social construction of technology in elementary schools, specifically those in India. What really resonated with me was when he said, “social constructivism is the belief that a technology’s purpose comes from people" (p. 8). This switched gears for me from thinking about having my students learn how to use Makey Makey for the sake of learning how to use technology to learning how to use Makey Makey to use it to solve problems they desire to. This led me to narrow my search further to using technology specifically in math in the classroom. In continuing my search for studies on technology in classrooms, specifically math, I found another interesting dissertation by Eryn Stehr, also of Michigan State. She did a case study on teachers' conceptions and noticings while using technology to teach math in the classroom. In the Final Evaluation Template within Stehr’s dissertation, she brings up some important questions about using technology and math in a particular lesson. Specifically, she asks about what learners need to know when using the technology, engagement, accessibility, and differentiation. Asking myself these questions about my first draft of my learning experience, I think I have the student knowledge portion covered as well as the engagement. I have set up the activity so that students won’t be expected to know how to use Sketch, I will do that portion, but they will learn how to use Makey Makey simply by connected the alligator clips, which shouldn’t be a stretch. As for engagement, I know for a fact that just by simply bringing a new technology, such as the Makey Makey, into the room and letting the kids use it, they will be interested. In addition to using Makey Makey, students will also get to keep the item for the day that they correctly paid for. What I do need to further evaluate, however, is the accessibility and differentiation. These were two points that were also brought up by my peers in their evaluations. Although I’d like to think I had these ideas in the back of my head when I was designing my learning experience, I failed to plan them out and put them down on paper. Oftentimes, this step can be overlooked by teachers (including me) when planning a lesson since you feel it might just come natural to adjust your lesson for these reasons in real time. I am realizing that no matter how homogeneous I might feel my student population is at times, I need to be more intentional in planning for accessibility and differentiation. Peer A gave me good feedback on the intersectionality of my lesson plan. She shared with me that when reading my lesson plan through the lens of a student from an immigrant family with a low socioeconomic status she feels excited by the opportunity to use the technology and be able to keep her correctly purchased item, but she fears what will happen if she gets the answer wrong. This made me sad to think about one of my students actually feeling this way! So, I added a portion to my lesson plan that will make this task accessible and achievable for all my students. See Figure 1 below to see my plan. 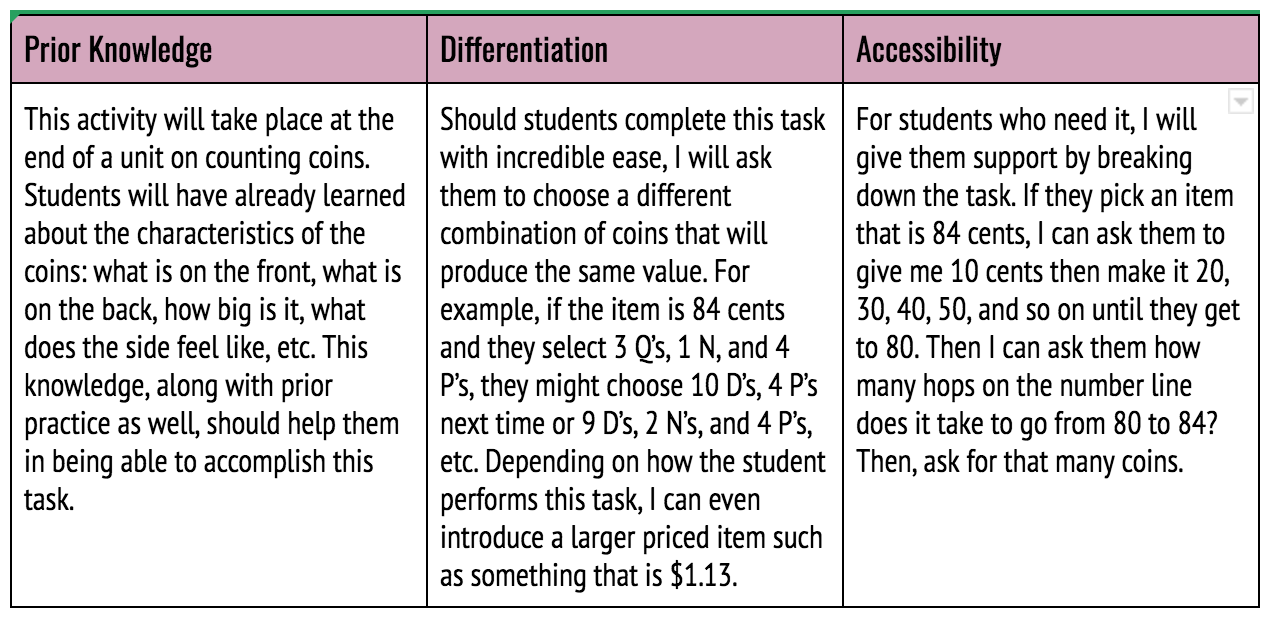 Figure 1: The Prior Knowledge, Differentiation, and Accessibility portions of my lesson plan. Photo by: Hayley Justin Peer B shared with me her feedback when considering Universal Design for Learning while reading my lesson plan. As a fellow first grade teacher, she was able to understand my plan quickly as she teaches to the same standards. This was a plus because this helped her to quickly point out the areas where she has had successful experience that maybe I was missing. One of these major areas was the students who mastered this task with ease. I then realized I left out a whole section on differentiation in my lesson plan. She also noted that it might be beneficial for the students to work together during this activity to both encourage collaboration and also increase accessibility. See Figure 1 above for more details on my plan.
All in all, in my editing process I received great feedback from my peers and found helpful research that I believe made my lesson plan so much more prepared for a real-life classroom. If only I could spend this much time planning each and every one of my lessons! Here's to #innovativelearningexperiences! Byker, E. (2012). The Bangalore Challenge: Case Studies of the Social Construction of Technology in Elementary Schools. (Doctoral dissertation). Retrieved from https://lib.msu.edu/ Stehr, E. (2017). Digital Resources and mathematics: Teachers’ Conceptions and Noticings (Doctoral dissertation). Retrieved from https://lib.msu.edu/
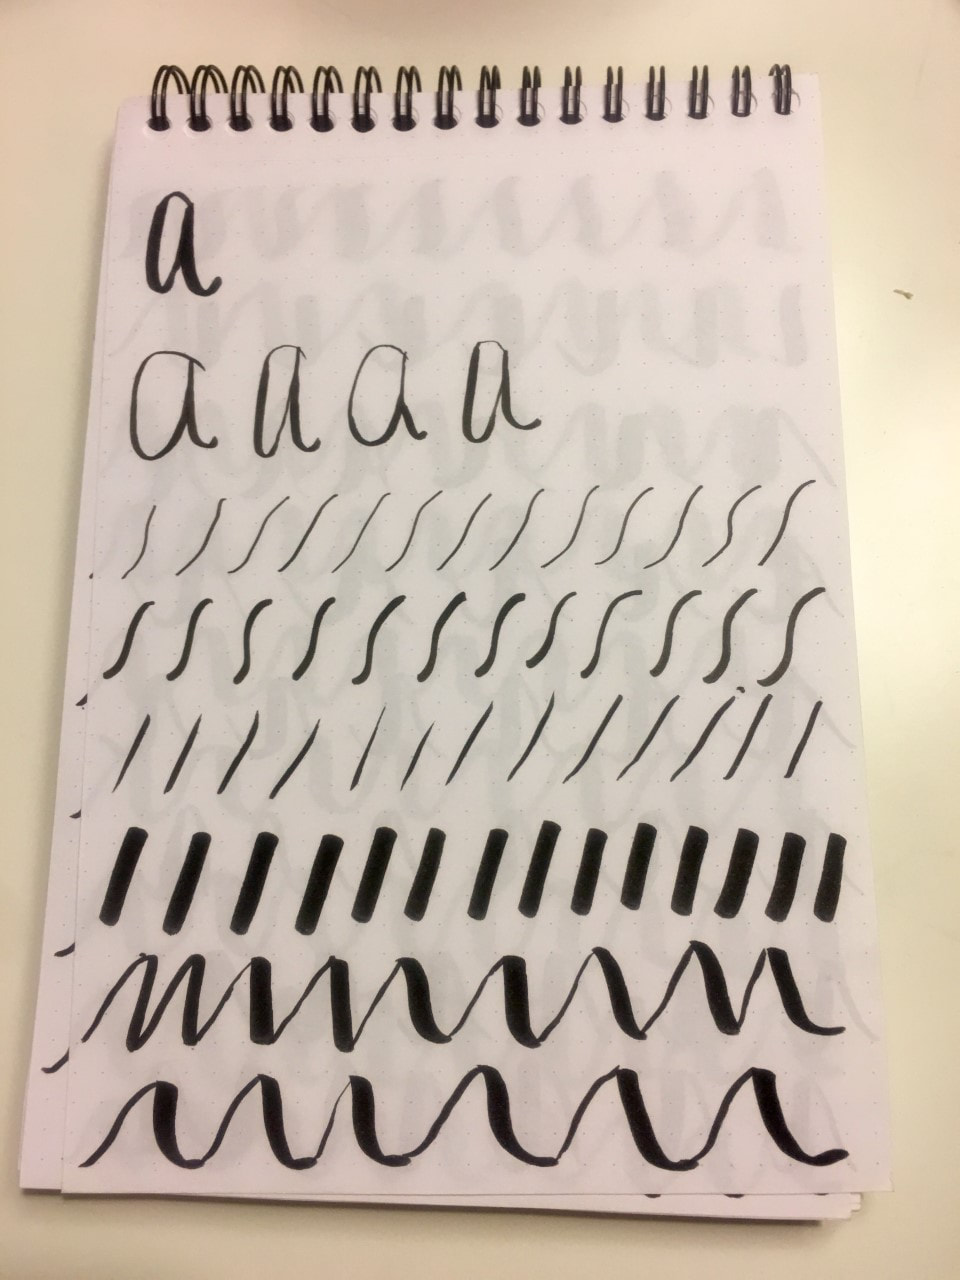
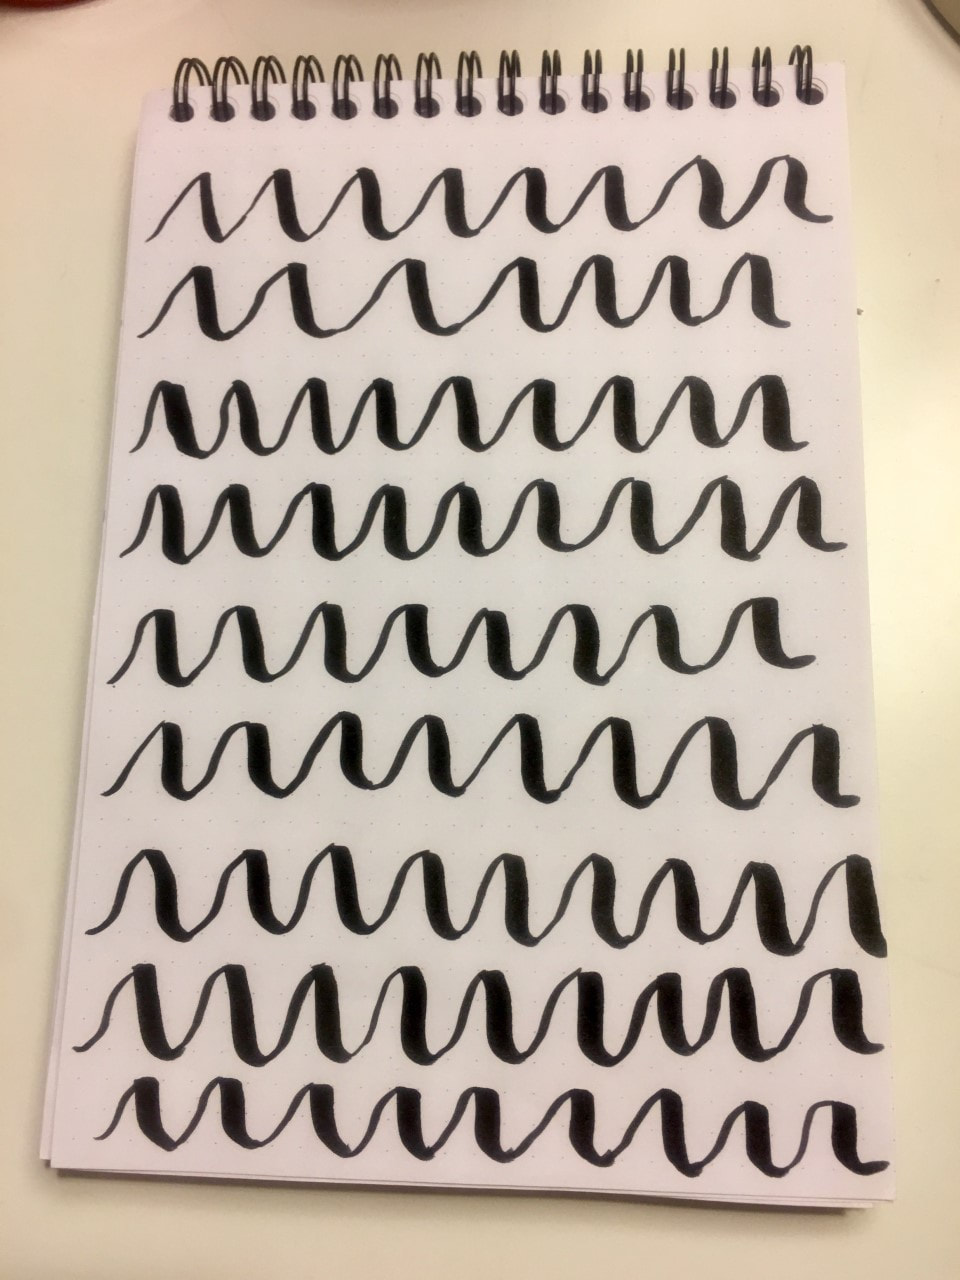
After a little over 2 weeks of trying #myhandathandlettering, I can confidently say that I have progressed from practicing simple strokes and pretending to know what I’m doing to actually being able to write some letters that look like what I’ve seen all over Instagram. Yay! During my practice, I’ve played with different pens and even different paper. I was starting to think that all these people on Instagram have magical powers because my hand won’t produce the same beautiful writing as them! However I finally reached a turning point when I figured out how to hold the pen a little differently. After I watched a video by How to Hand Letter on YouTube, I learned about 5 mistakes beginners usually make. One of these mistakes was not holding their pen the right way and not lifting it after every letter or even every stroke. This, along with the other “mistake” of not slowing down your writing made all the difference in my hand lettering. After changing my grip and slowing WAY down, my strokes finally started to look how I wanted them to. Take a look at the pictures below to see the difference from before I changed my grip and after!
By no means am I to the point of successfully writing full words yet, although that’s not to say I haven’t tried…I find that I am eager to write words now just as I was eager to write letters in the beginning. But if the road to words is anything like it was to letters, I learned that it is best to just keep practicing the same stoke/letter/word over and over until it starts to feel more natural. What’s even cooler is that once you start to get used to it, it gets easier! Check out my progress below.
Today is the first day of August. Traditionally, my school district always starts the day after Labor Day…not this year. We are starting school on August 26. Allow me to repeat myself: today is the first day of August. AUGUST!! This means that in 25 days I will be meeting my students! This also means that in 25 days I will have to be ready for a brand new school year. *insert wide eyed emoji*
With back to school quickly approaching, it’s time to think about how I am going to take all I am learning from my MAET courses back to my classroom. This week, I sat down and wrote a lesson plan that should push my classroom into the 21st century. (We’ve been there, right?) After much research on 21st century learning, digital literacies and related key competencies, I’ve crafted something I believe goes beyond what I have been doing in my classroom for the last two years. When drafting my 21st century lesson plan, I wanted to be sure it was something allowed my students to learn something new, be engaged, but would also make sense for our learning objectives. (Hello, TPACK.) I decided to go with a giant assignment we do every year in the spring: a research project and Non-Fiction book on animals. Every year this is always one of my students’ favorite writing pieces. It’s almost like they are relieved to be able to report on their findings instead of having to create a narrative story. Also, if you’ve ever met a 6 or 7-year-old, you know that they LOVE to share random facts about whatever they’re interested in. This is a great outlet! Traditionally, students’ research for their Non-Fiction books is done using a couple of books we already have in our classroom, neighboring classrooms, or our library. However, sometimes this can be challenging if the books don’t have the answers they are looking for. This makes the perfect opportunity to use technology. I decided my students would use multiple means of researching including the traditional books we’ve always used, an app called Epic that houses books online, and two kid-friendly search engines: Kiddle and KidRex. My final online tool that students will be using to present their findings is Book Creator. I am so excited for them to use it, I might not be able to wait until spring! The most challenging and time-consuming part of creating my 21st century lesson plan was actually creating a book myself! I made a book on Book Creator called All About Puppies (since they are our classroom theme). Although it took time I wished I could’ve been working on my own assignments for my classes, I had so much fun doing it. Sometimes I forget that I need to stop and put myself in the shoes of my students. Using all these online tools in one lesson might be a challenge for them, but I can’t wait to see them grow as a writer, reader, and a digital citizen. Here’s to striving to be a #classroomofthe21stcentury!
This week I dove into two pretty giant terms Universal Design for Learning and Intersectionality. I started off feeling like they couldn’t be more different but as I’m rounding out my research I’m finding they are more similar than I thought. If you take anything away from this please be that UDL and Intersectionality are both ideas teachers should be thinking about in the planning process of their lesson, not the reflection.
Students in our classrooms are becoming increasingly different from each other. They may be different races, speak different languages, or come from different socioeconomic backgrounds. They also could like race cars, barbies, or dinosaurs. While comparing race to race cars sounds strange, they are both pieces of information that are important for a teacher when planning a lesson. She wouldn’t want to make a student feel uncomfortable during a lesson because of their race, and the same goes for their interest in race cars. Take a listen to my podcast as I explore how my thoughts on UDL and Intersectionality evolved this week and even some examples from my first grade classroom. Here's to being #armed&ready for a new group of students!
Is it me or does the phrase 21st century still sound futuristic? That Disney Channel movie, Zenon: Girl of the 21st Century about a teenager living on a space station ringing any bells? Well, whatever it makes you think of, we are living in it and need to adapt to it. The way teenagers (would) live in space is drastically different than they did in Little House on the Prairie. Likewise, the way teachers taught and students learned ought to be drastically different too.
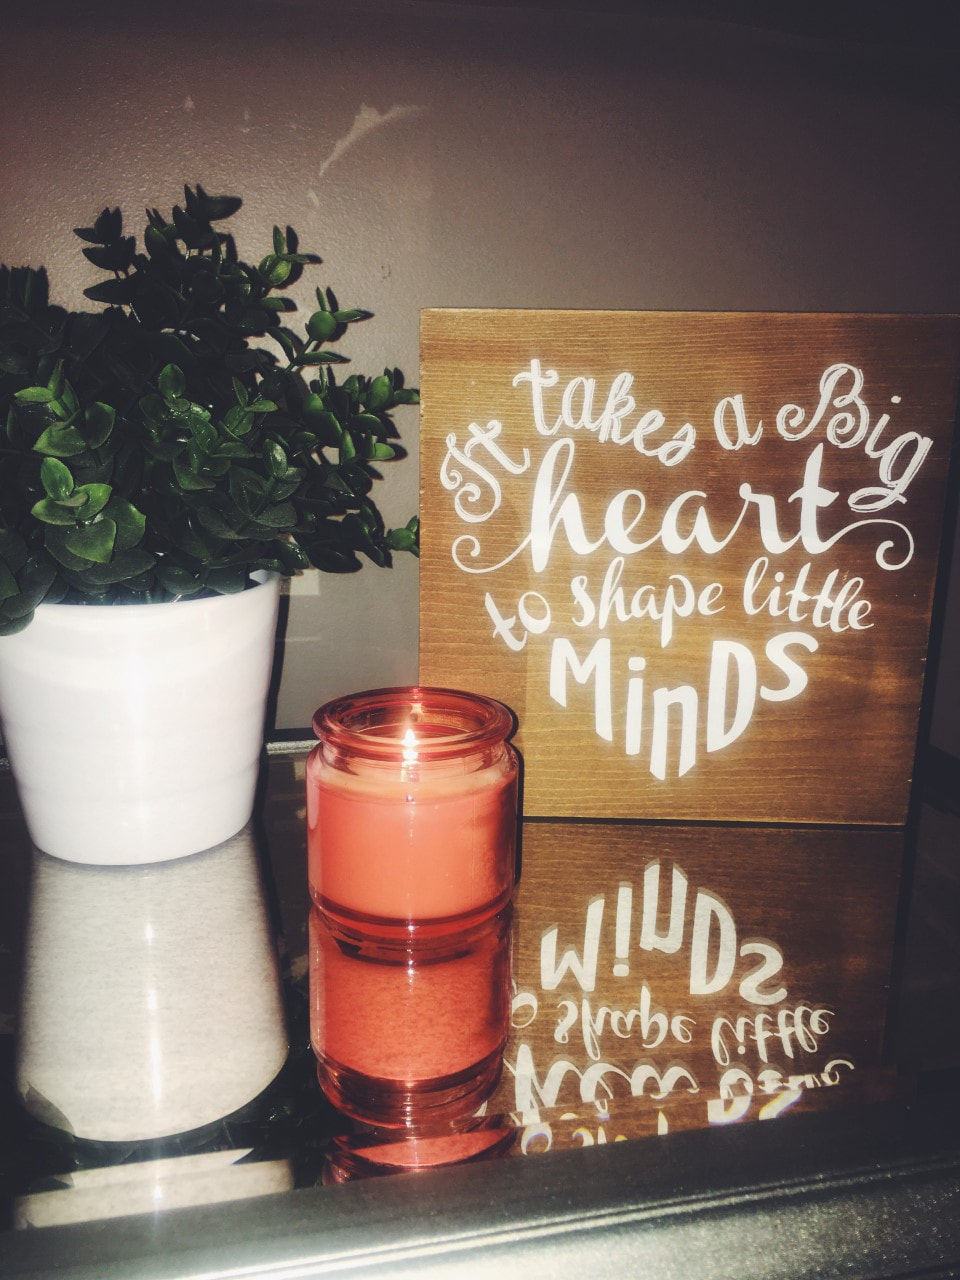
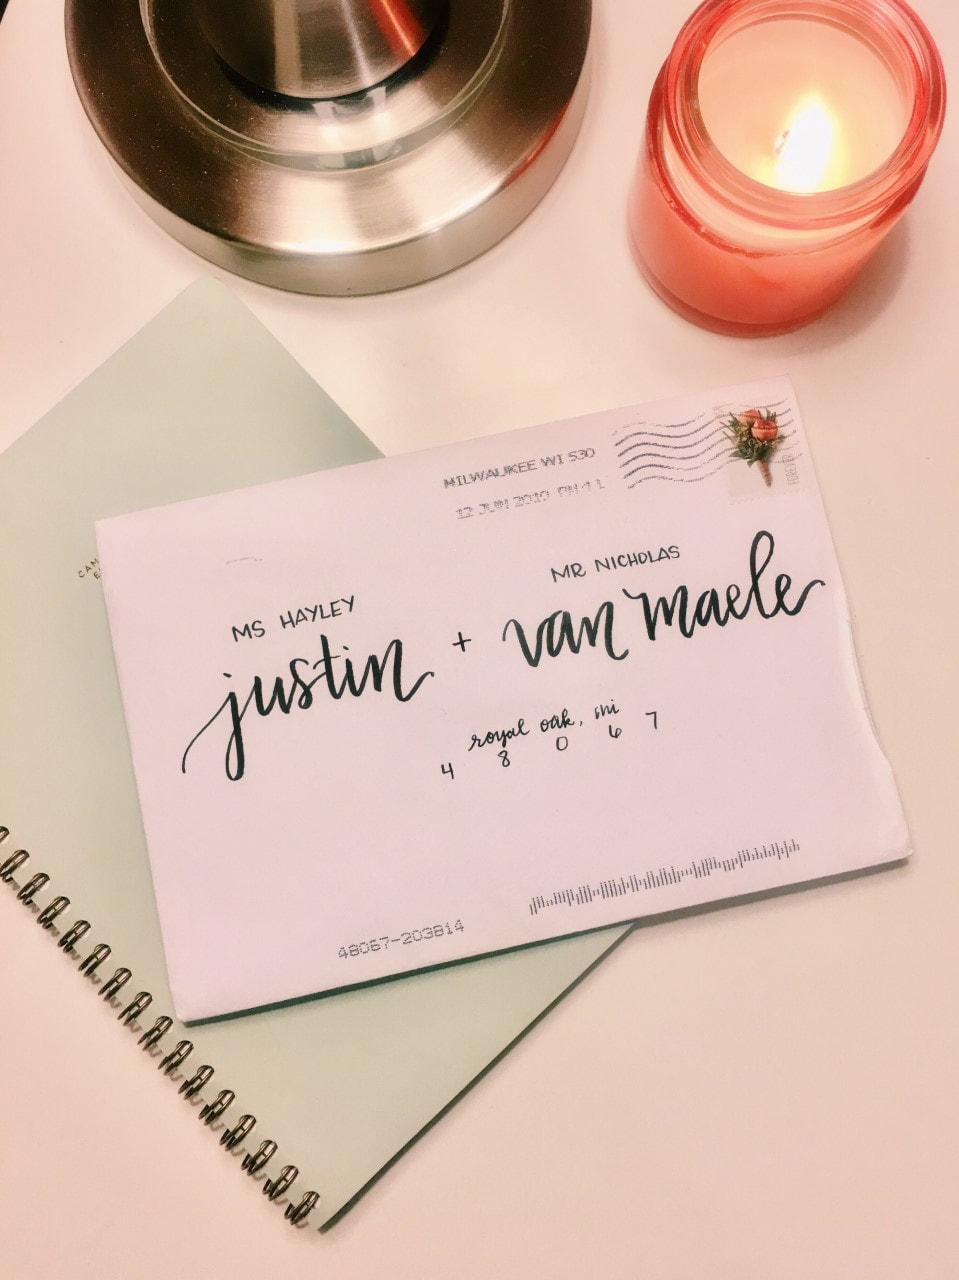
This week, I spent some time exploring 21st Century Learning. What does a 21st Century classroom look like? What should it look like? How is it the same as it used to be? How is it different? In my research I discovered The 4 C’s of 21st Century Learning. These are essentially 4 focal points for 21st Century Learning in the classroom. They are collaboration, creativity, communication, and critical thinking. Take a look at this video I made exploring The 4 C’s along with how I implement them in my classroom now and how I’d like to in the future! Here's to #21stcenturylearning! Bridal showers, graduations, invitations, oh my! I’ve made it to the point in my life where it seems like everyone who is close to me is experiencing a major life event. My two best friends are each getting married, my boyfriend just graduated medical school, my friends are getting jobs and my siblings are having kids. With each milestone, I find myself Pinteresting ideas for personal gifts and decorations. When I was presented with the opportunity to choose something new to learn using only online resources, I decided now was the time to take matters into my own hands – literally. Over the next few weeks, I am going to learn how to write using hand lettering or modern calligraphy. What on earth is that, you ask? It’s the beautiful lettering you see in the photos below.
I’ve started by watching a few different YouTube videos and reading a couple blogs. One video on YouTube was particularly helpful since the creator, AmandaRachLee, shared the tools I would need to get started. She suggested specific markers like TomBow Brush Pens and TomBow Fudenosuke Brush Pens, so I went out and bought both! She didn’t mention anything about paper, so luckily I had noticed something in Little Coffee Fox’s blog. She highly recommended the Rhodia dot pad, which was also recommended by many other sources I found. I tried to find it Hobby Lobby, Joanne’s and Michaels but had no luck so I settled on a sketchbook. 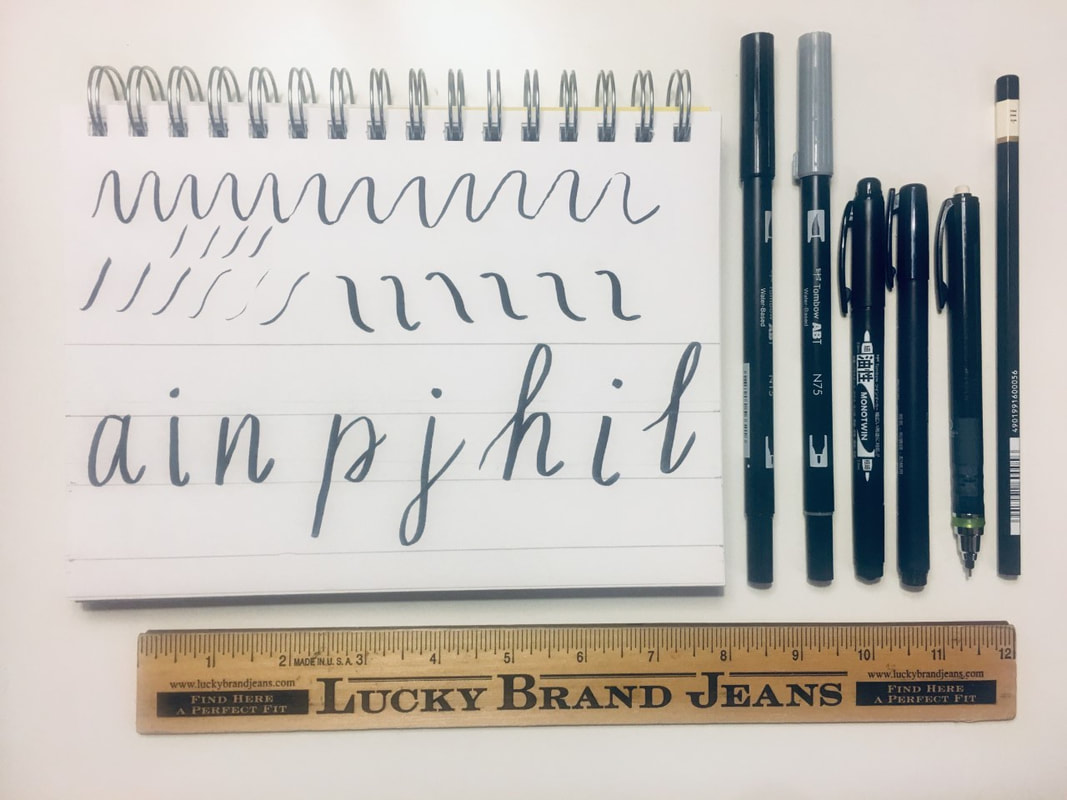 Figure 3: A practice page in my sketchbook. Photo by: Hayley Justin After trying a few exercises from AmandaRachLee’s video, I decided that I needed to order the Rhodia dot pad online. The blank pages in my sketch book make it difficult to line up my letters and it was getting far too time consuming and frustrating to draw my own lines. I am counting down the (2) days until my dot pad arrives in the mail, TGFAP (Thank God for Amazon Prime). Here’s to trying #myhandathandlettering!
Abrahamsen, S. (2019, June, 3). The Ultimate Hand Lettering Guide for Beginners (2019) [Blog post]. Retrieved from https://littlecoffeefox.com/hand-lettering-guide-for-beginners/ Lee, A.R. [AmandaRachLee]. (2017, June 15). How To: Calligraphy & Hand Lettering for Beginners! Tutorial + Tips! [Video File]. Retrieved from https://www.youtube.com/watch?v=sBoVGqiSzr4 Ever heard of a banana piano? How about a cat taking selfies? These are just a few things you can do with Makey Makey – an electronic tool that allows you to connect everyday objects to your computer. I was recently introduced to Makey Makey and started exploring with it myself. After playing a little soup can DDR (Dance Dance Revolution, for those of you who remember), I started thinking about all the different ways Makey Makey could be used in the classroom. Of course for fun but what about reading? Writing? Math? SCIENCE?! The possibilities are endless! 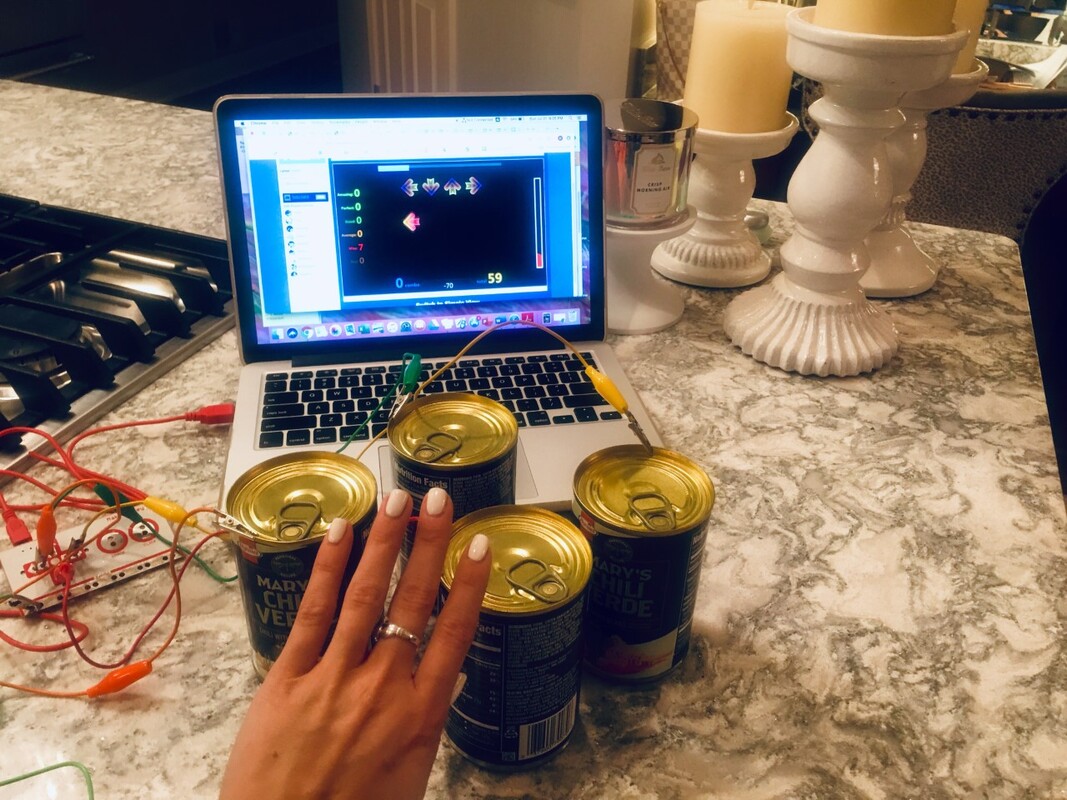 Figure 1: Makey Makey in use to play soup can DDR. Photo by: Hayley Justin If I was going to use this in my classroom for the very first time, I decided I needed to narrow it down to a very specific topic – counting coins. Every time I teach about counting coins I notice my students struggling to bridge the gap between knowing the value of each coin and their knowledge of addition. It can be hard for such little ones to use these concepts simultaneously! After researching the Makey Makey website, I found yet another technology that can be used along with Makey Makey to make it even better! This technology is called Scratch – a place where you can create, or use created interactive stories, animations, and games. This is where I hit my home run. On Scratch, I found an already created animation of a cash register that tallies up your value AND the amount of each coin used. Having Scratch as a source of already created animations plus allowing you to create new animations yourself makes Makey Makey even more easy to incorporate with already existing curriculum. You can find my Innovative Lesson Plan here. Here's to #makingwithMakeyMakey!
Where do you go when you are looking for something new to try in your classroom? Who do you ask for help when implementing it? Do you share cool ideas you’ve come up with on your own? This week, I asked myself these questions and made a mind map of my Professional Learning Network, or the resources that help make me a better teacher. Check it out in Figure 1 below! 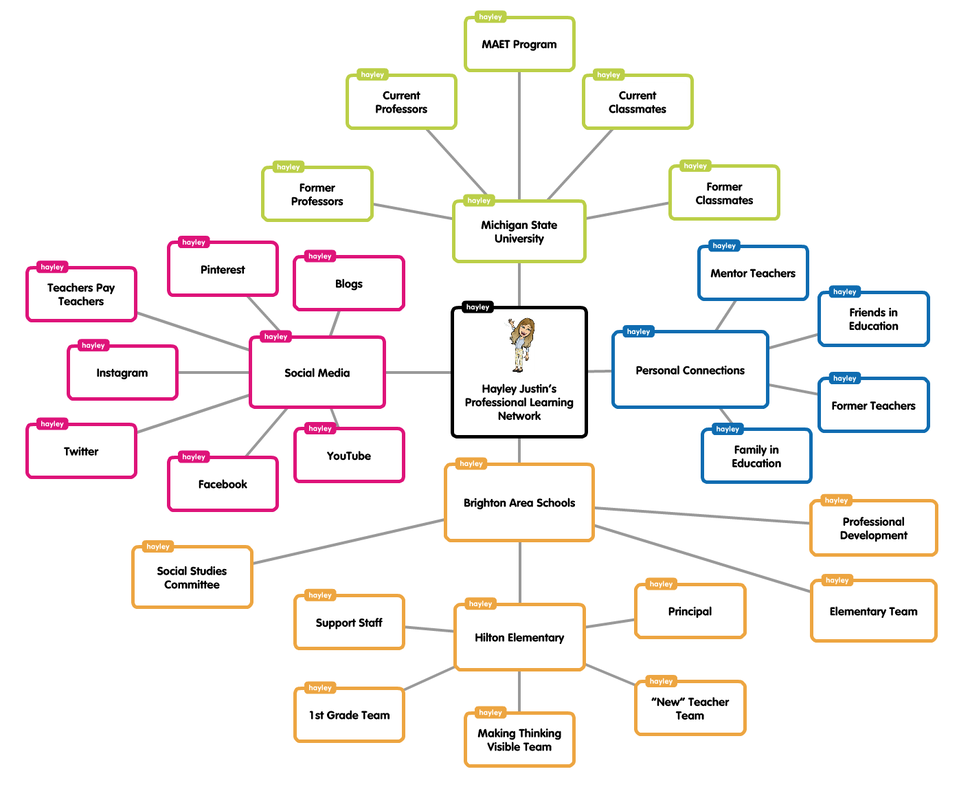 Figure 1: A mind map of my Professional Learning Network. Popplet by: Hayley Justin Mapping out my network helped me see how many connections I have outside of my school district. Traditionally, you would think most ideas and innovations would come from your place of work but the amount of inspiration I get from social media whether it’s Pinterest, Instagram, blogs and more is almost equal to my connections within my district. I am also very grateful for the personal connections I am lucky enough to have since these particular resources make for a great teaching support as well as an emotional support. My connections to Michigan State excite me because they are so much bigger than others. For instance, I am learning things from the MAET program I can bring back to my district as a brand new concept to them. An area I could strengthen would be the resources I get from professional organizations, but I hope that getting my master’s will help with that.
More than anything, this mind map made me see myself as the connection between all these networks. I can be the one to bridge ideas from a teacher’s blog from Arizona to my school in Michigan. I can be the one to teach my mentor teacher about TPACK I learned in the MAET program. I can be the one to help a fellow teacher learn more about Visible Thinking. How cool is that? Here’s to #makingconnections!
In a world where almost everything is posted and re-posted online, tweeted and retweeted, it’s hard to conceptualize modern-day copyright. I spent some time this week studying media use by researching copyright, fair use, attribution, licensing, transformativeness and creative commons. To be honest, I’m still a little confused. Each and every scenario could be different! However, I do feel like I have a better handle of what can and can’t be used by a teacher, which was my most goal. See this chart for a breakdown about copyright and fair use for teachers specifically.
Overall, my biggest takeaway is that even though everything is so accessible nowadays, that doesn’t mean you can use it. A creative work is covered under copyright the second it is made. So, when we do find something we would like to use, how can we go about that? Here’s a video I made about copyright and what to do when you want to use someone else’s work. In addition to the five steps given in the video, you can also visit Creative Commons website. Creative Commons is a great resource for images, audio, and videos that are free and legal for you to use. You can even license your own work for others to use as well. Here’s to #copyingright! Audio: Box. (2012). “Circle of Life” Lion King Rap Instrumental [Audio File]. Retrieved from https://soundcloud.com/boxedproductions/circle-of-life-lion-king-rap Information: Common Sense Education. (n.d.). Copyright and Fair Use Animimation [Video file]. Retrieved from https://www.commonsense.org/education/videos/copyright-and-fair-use-animation Copyright in General. (n.d.). Retrieved from https://www.copyright.gov/help/faq/faq-general.html#what. Video: Hopper, Harrison. (2018, April 15). Full VHS Tape: The Lion King [Video File]. Retrieved from https://archive.org/details/TheLionKing20thAnniversaryEditionFullScreenDigitalCopyENG199420141080p |
 RSS Feed
